UIKit App Development without Storyboard
If I have to pick one best unit (subject) from my postgraduate study, I will choose the iOS Development unit without any hesitates. The choice is made not only because I’m a fan of Apple, but also the iOS unit is the most useful among all my Master course units. However, although I describe the unit as the most useful, many of its delivery contents are very apart from the real production environment, for example, Storyboard.
I enrolled on this unit at a point when Apple just finished WWDC 2020. At that moment, Apple introduced SwiftUI 2, while it’s still not very capable of building a complex app. UIKit is still the mainstream, so it’s normal for our unit to taught UI implementation with UIKit. However, when I get an iOS internship and get deeper into iOS development in the real world, I found it’s not so common for developers, at least in China, to build an iOS app UI with Storyboard. Although Storyboard is very straightforward, especially for beginners, it has some drawbacks when you want to build an app with complex functions.
It took me some time to figure how to do iOS development with UIKit but no Storyboard.
Create a Clean New Project
By default, Xcode always creates a UIKit project with Storyboard. I tried just deleting Main.storyboard, and it caused building errors as expectations.
For
LaunchScreen.storyboard, it’s just a splash screen. We usually keep it because apps need to have a launch screen.
As everyone can imagine, the project files hold references to Main.storyboard as the main entrance to our apps. To get rid of it, we need to remove all the references to it along with Main.storyboard itself, then use our own root ViewController as the app’s start point.
Fortunately, I found a post by Sarun introducing how to create a new Xcode project without Storyboard. Follow the step-by-step instruction and it should be easy to achieve that.
Building UI Programmatically
When using Storyboard, we usually work between Storyboards and ViewController classes to implement what we want.
In Storyboard, We can add UI components to our ViewControllers through drag-and-drop, and set attributes of it through inspectors. To layout our views, we can set hard-coded size and location for each component through Size Inspectors, or add constraints to let Auto Layout do the job according to different screen sizes. There’re lots of things we can do in Storyboard.
However, when our needs become more dynamic, we have to turn back to code. We bind our ViewControllers from Storyboard to our custom ViewController classes. We also create IBOutlet and IBAction in classes to make references to components in Storyboard, so we can manipulate them in runtime through code.
Now since we’re done with Storyboard, we need to do everything within code. It sounds more complex, but it’s actually easier than jumping between Storyboard and code, which separating our UI component configurations and logics with no senses.
Create and Configure Components
Instead of creating IBOutlet as references to UI components in Storyboard, we can instantly create UI component instances within a class as its properties, and then add them to ViewController’s root view through addSubview(_:).
class ViewController: UIViewController {
    lazy var label: UILabel = {
        let label = UILabel()
        label.text = "Hello world!"
        return label
    }()

    override func viewDidLoad() {
        super.viewDidLoad()

        view.addSubview(label)
    }

    ...
}
In the preceding code, it uses a closure to initialize the property and configure it with the text “Hello world!”. We can also configure it in viewDidLoad().
class ViewController: UIViewController {
    lazy var label = UILabel()

    override func viewDidLoad() {
        super.viewDidLoad()

        label.text = "Hello world!"
        view.addSubview(label)
    }

    ...
}
Layout View Components
Similar to the old Storyboard ways, we can layout views with or without Auto Layout.
Manual Layout
As every UI component class is actually a subclass of UIView, its size and location can be set through its frame and bounds. The difference between frame and bounds is that frame describes a view’s size and location within its superview’s coordinate, while bounds is about the view’s own coordinate.
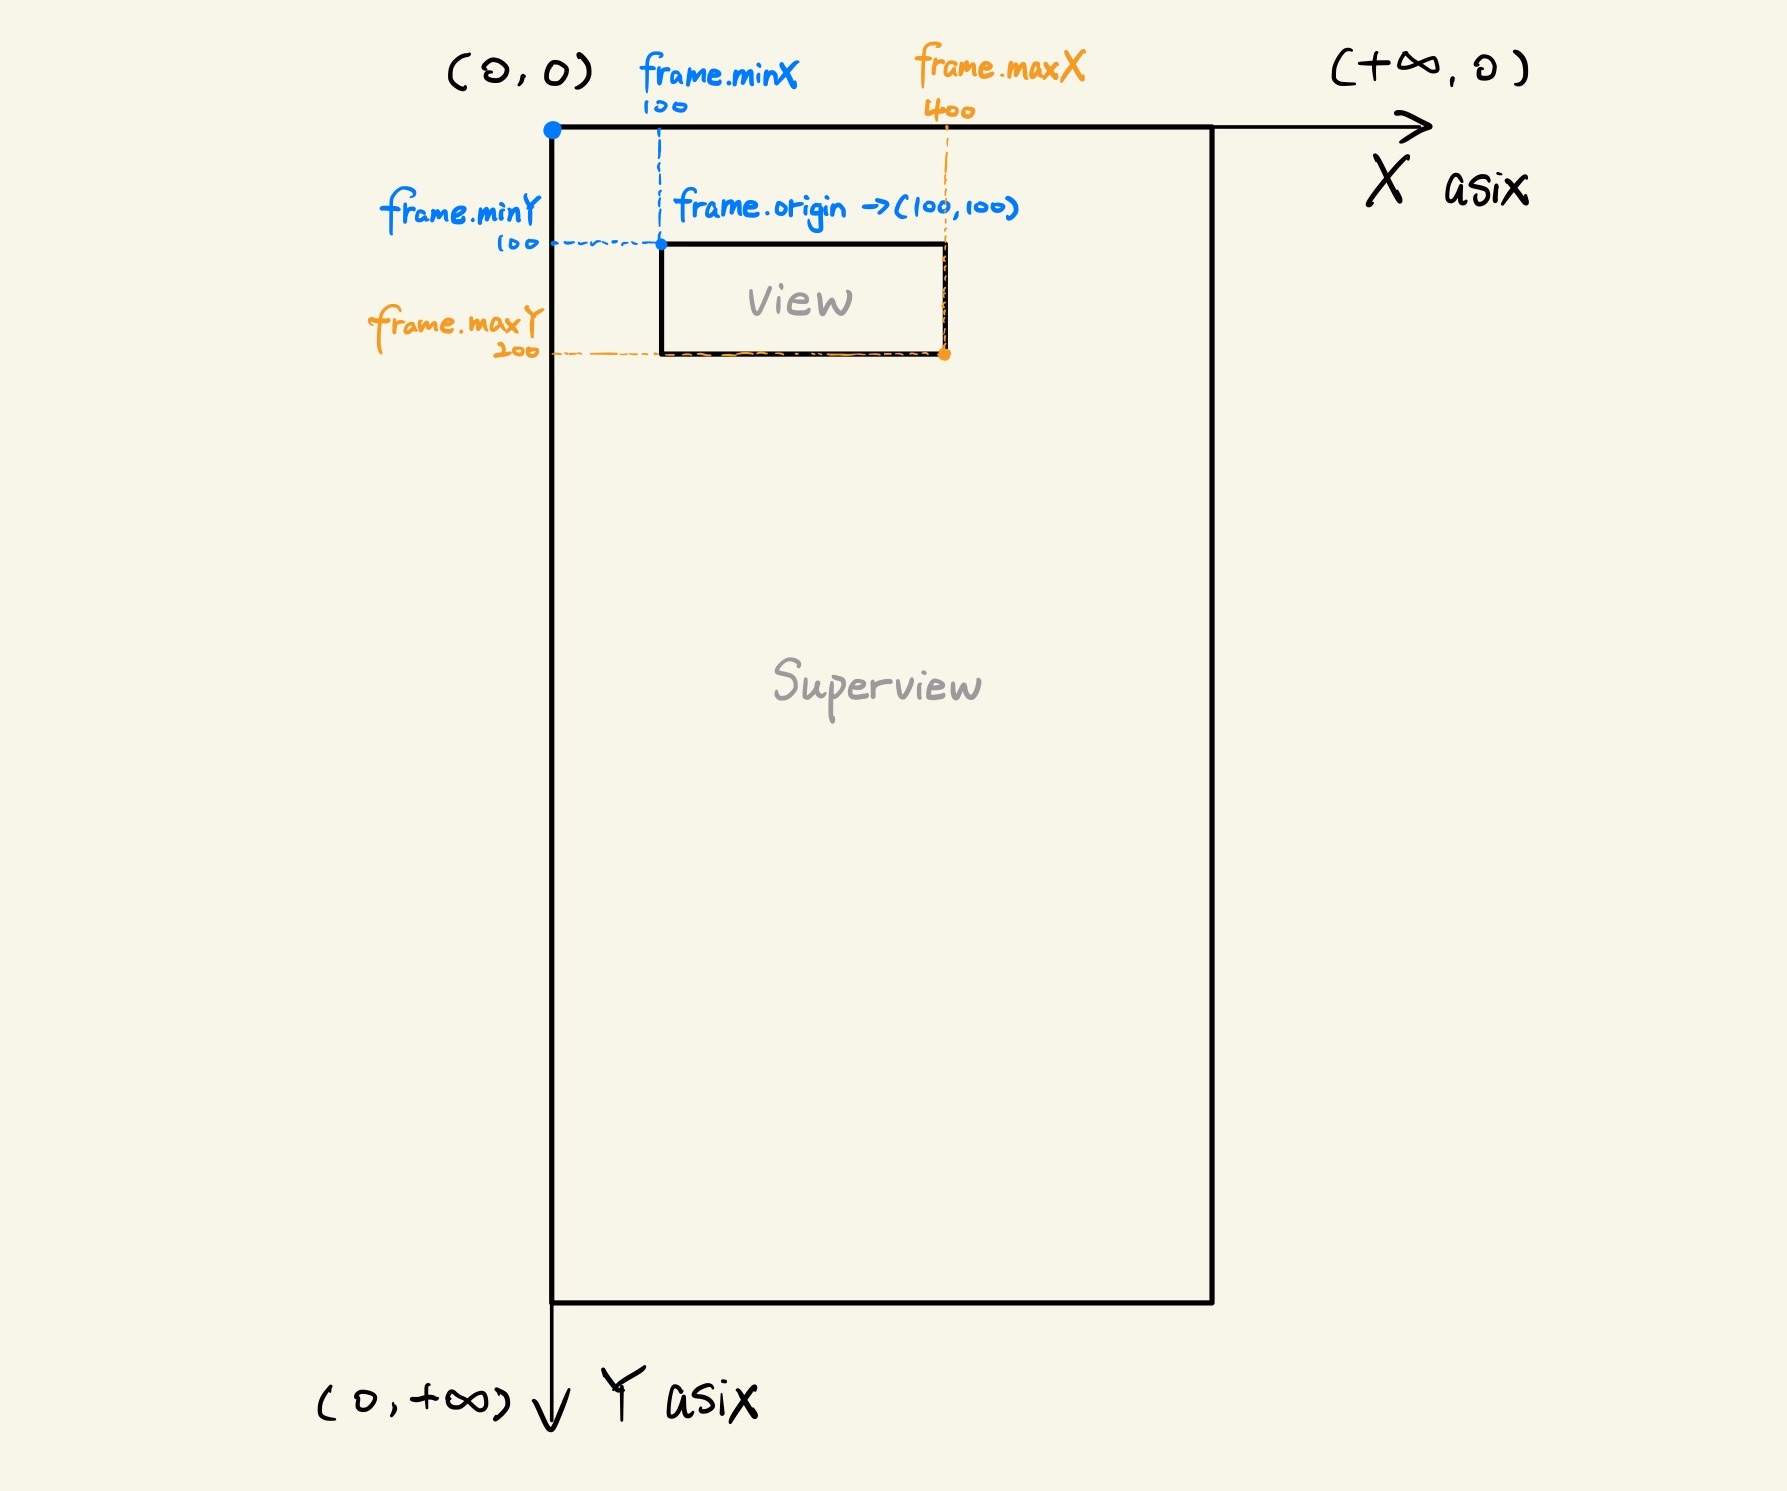
To implement the preceding image, we can set view’s frame.orgin and frame.size like following:
class ViewController: UIViewController {
    ...

    override func viewDidLayoutSubviews() {
        super.viewDidLayoutSubviews()

        label.frame.origin = CGPoint(x: 100, y: 100)
        label.frame.size.width = 300
        label.frame.size.height = 100
    }

    ...
}
Auto Layout
Manual Layout could be convenient sometimes, but in most cases, we need to consider different screen sizes. Nowadays, various screen sizes and shapes of iOS devices require the layout system to be more flexible, that’s why Auto Layout kicks in.
Technically, you can create Auto Layout constraints by yourself through NSLayoutConstraint, while many developers don’t use it because its syntax is not that readable. Besides creating constraints directly, there’re many third-party layout libraries available. These libraries usually wrap the constraints stuff into DSLs with better readability, which makes it easier to define all the layout relationships.
SnapKit is one of the most widely-used and popular layout libraries. You can install SnapKit to your project by CocoaPods, detailed instructions can be found from its GitHub repo.
With SnapKit imported, we can set our UILabel to the centre of our ViewController with just a few lines of code:
...
import SnapKit

class ViewController: UIViewController {
    ...

    override func viewWillLayoutSubviews() {
        super.viewWillLayoutSubviews()

        label.snp.makeConstraints { make in
            make.center.equalTo(view.snp.center)
        }
    }

    ...
}
Except for SnapKit, there are other awesome layout libraries as well. Some of them are not even based on the original Auto Layout system, as Auto Layout may become a bottleneck for performance when the UI of an app becomes complex.
Conclusion
As we can see, working without Storyboard is not as difficult as we thought. The removal of Storyboard let us know more about how UIView and UIViewController work behind the scenes of Storyboard. Furthermore, it can also help us write more structural code. Although UI code in this post is written within the ViewController class, it’s always a good practice to split the UI presentation logic out from controllers.
Develop, Swift, UIKit, iOS — Jun 4, 2021